Foundation Crack Assessment Tool
This tool helps determine if your foundation crack can be safely repaired DIY or if you should call a professional. Based on your inputs, you'll receive a clear recommendation and next steps.
Assessment Inputs
Quick Takeaways
- Not every crack can be safely repaired yourself - know the red‑flags.
- Basic tools: safety gear, concrete cleaner, epoxy or hydraulic cement, pry bar, and a small saw.
- Step‑by‑step: clean, prep, seal, inject, cure, then seal again.
- Epoxy works best for thin, hairline cracks; hydraulic cement handles wider gaps and active water leaks.
- Call a professional if the crack is wider than 1/4", shifts after repair, or if you notice settlement.
Seeing a crack in the slab or crawl‑space wall can feel like a nightmare. You wonder whether you need to call a contractor right away or if a weekend fix will do the trick. The short answer is: some cracks are DIY‑friendly, others are not. This guide walks you through the assessment, tools, and exact steps to fix a typical foundation crack on your own, plus the tell‑tale signs that it’s time to bring in a pro.
Foundation crack repair is the process of sealing and stabilising fractures that appear in a building’s supporting foundation. A healthy foundation distributes loads evenly; a crack can let moisture in, shift loads, and eventually cause structural damage.
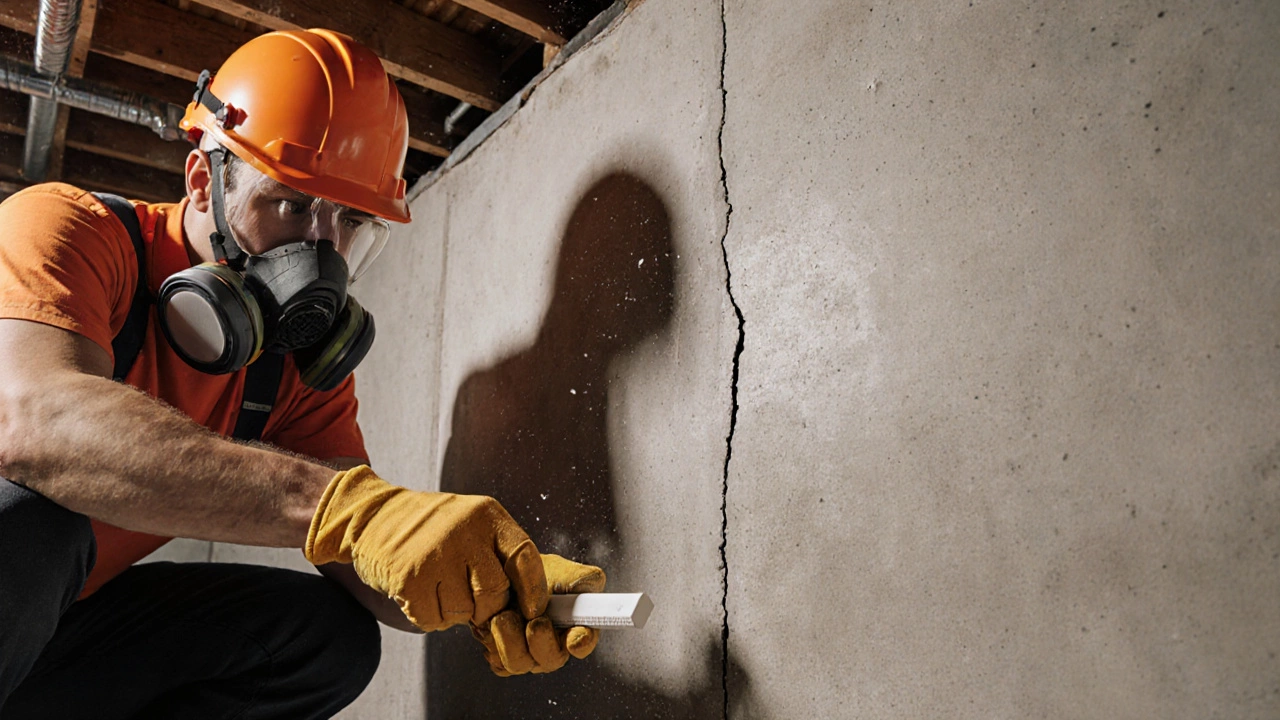
Assessing the Crack - Is DIY Really an Option?
Before you grab a bucket of epoxy, check these five factors:
- Width: Hairline (under 1/8") cracks are usually safe to seal yourself. Anything wider than 1/4" often signals deeper movement.
- Length: Short, isolated cracks (< 2ft) are easier to control. Cracks that spider across multiple walls suggest widespread settlement.
- Movement: Place a piece of chalk on the crack and mark it. Come back after 24hours - if the gap has widened, the soil is still shifting.
- Water presence: If water is actively seeping, you’re dealing with a hydrostatic pressure issue, which usually needs a professional drainage solution.
- Location: Cracks in load‑bearing walls or beneath columns demand engineering input.
If the answer to any of these points is “yes,” consider hiring a structural engineer for a detailed assessment.
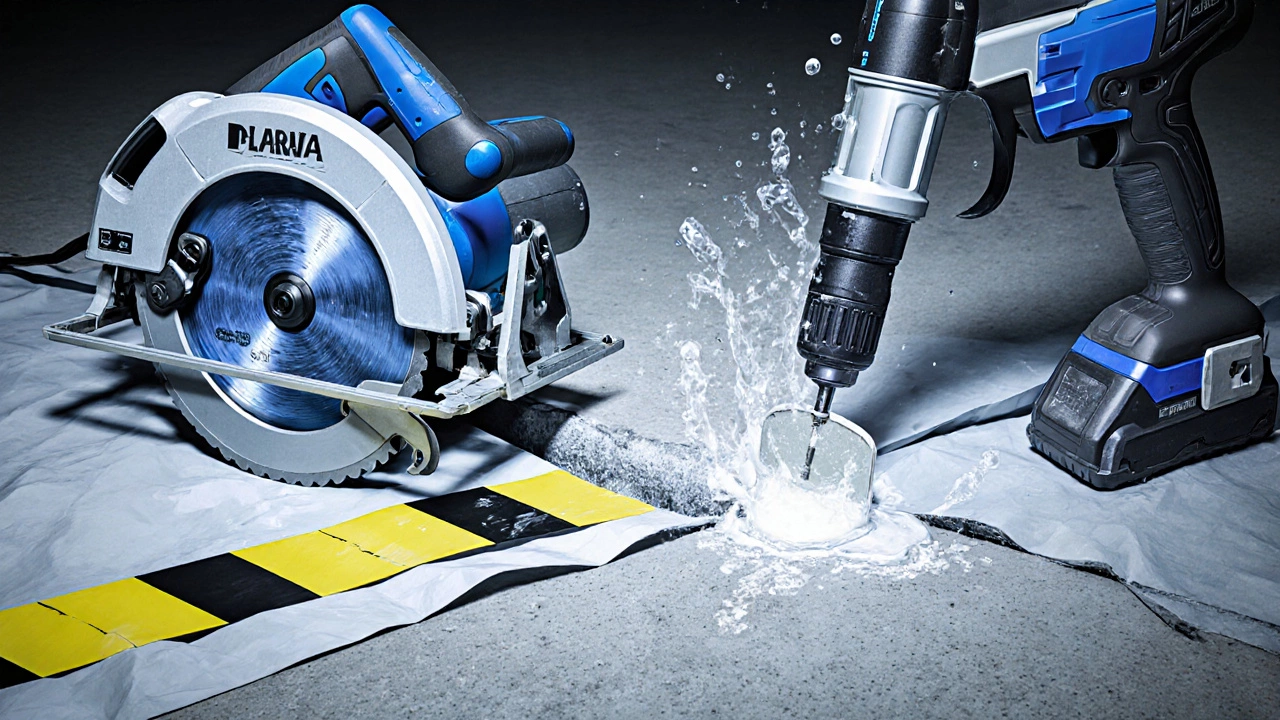
Safety First and Tool Checklist
Working with concrete can produce dust and sharp edges. Wear a respirator, safety glasses, gloves, and sturdy boots. Here’s a concise list of what you’ll need - each item is highlighted the first time it appears:
- Concrete cleaner (or a stiff bristle brush and trisodium phosphate solution)
- Pry bar - to lift loose chunks
- Circular saw with a masonry blade - for cutting neat V‑grooves
- Drill with a mixing paddle - for epoxy/hydraulic cement
- Epoxy injection kit or hydraulic cement (see comparison below)
- Sealant (silicone or polyurethane for final coating)
- Plastic sheeting and painter’s tape - to keep the work area clean
Step‑by‑Step DIY Repair Process
Follow these steps in order. Skipping a step often leads to a repair that fails within weeks.
- Clear the area. Remove furniture, stored items, and any loose debris from around the crack. Sweep away dust and dirt.
- Clean the crack. Apply concrete cleaner and scrub with a wire brush. Rinse with water and let dry completely - moisture will prevent adhesives from bonding.
- Create a V‑groove (optional but recommended). Using the circular saw, cut a shallow V‑shaped channel along the length of the crack, about 1/4" deep. This gives the repair material a better key.
- Seal the surface. Apply a thin bead of sealant along the crack to block water while you work. Let it set for 10‑15minutes.
- Choose your repair material. For hairline cracks, mix the epoxy injection according to the manufacturer’s directions. For wider gaps or visible water seepage, use hydraulic cement.
- Inject or pack the material. With an injection gun, press the epoxy into the V‑groove from the lowest point upward, ensuring no air pockets. If using hydraulic cement, push it in with a trowel or putty knife, over‑filling slightly.
- Tip: Tap the surrounding concrete lightly with a hammer - this helps the material flow into micro‑cracks.
- Smooth and finish. Use a trowel to level the surface with the surrounding slab. If a V‑groove was cut, feather the edges so the repair blends in.
- Cure time. Epoxy typically cures in 24hours; hydraulic cement sets within 30minutes but continues to harden for 7days. Protect the area from traffic and moisture during this period.
- Final seal. Once cured, apply a waterproof sealant over the repaired spot to guard against future infiltration.
That’s it - a solid, water‑tight patch that, when done correctly, can last for years.
Epoxy Injection vs. Hydraulic Cement - Which One Fits Your Crack?
| Attribute | Epoxy Injection | Hydraulic Cement |
|---|---|---|
| Best for | Hairline to 1/4" cracks, dry conditions | Wider gaps (up to 1/2"), active water leaks |
| Flexibility | High - adheres to movement without cracking | Low - hardens rigid, can crack if foundation shifts |
| Setting time | 10‑20min work time, 24hr cure | 30min set, full strength in 7days |
| Water resistance | Excellent when fully cured | Good, but may shrink if excess water present |
| Cost per sqft | ~$3‑$5 | ~$2‑$4 |
In plain English: if the crack is thin, dry, and you want a flexible bond, go with epoxy. If it’s wide, you see water, or you need a quick set, hydraulic cement is the better choice.
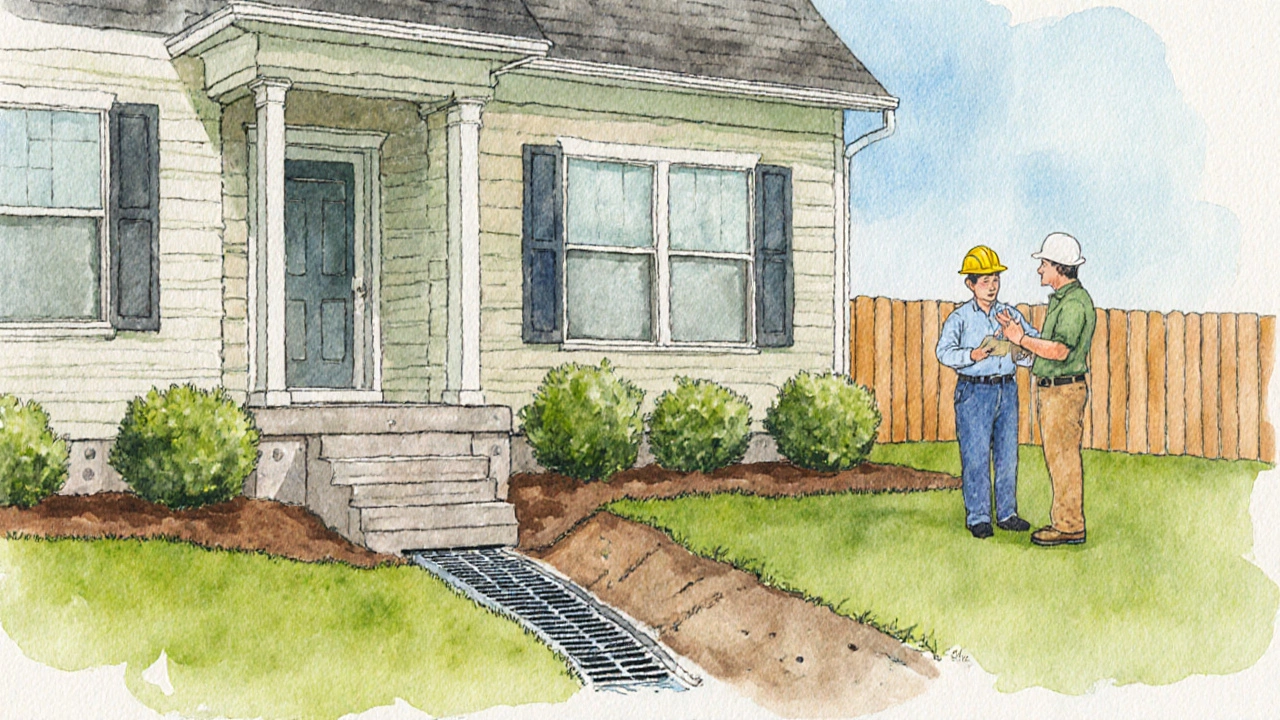
Preventing Future Cracks
Repairing a crack is only half the battle. Here are three practical steps to keep your foundation happy:
- Control moisture. Ensure gutters direct water at least 6ft away from the house. Install a French drain or a perimeter footing drainage system if the soil stays soggy.
- Maintain proper grading. The ground should slope away from the foundation at a minimum of 5% (1 in 20).
- Monitor soil movement. Expansive clays are common in Wellington. Plant trees at a distance of at least 15ft from the house, and avoid planting large shrubs directly against the foundation.
By tackling water and soil pressure, you drastically reduce the chance of new cracks forming.
When to Call a Professional
Even the most seasoned DIYer knows when to quit. Call a professional if you encounter any of these conditions:
- Crack wider than 1/4" and still expanding after your first attempt.
- Horizontal cracks that run across multiple walls - a sign of differential settlement.
- Visible tilting or uneven floors.
- Persistent water seepage despite a sealed repair.
- You lack the proper safety equipment for heavy concrete removal.
A qualified structural engineer can perform a load analysis, while a licensed foundation repair contractor can recommend underpinning, pier installation, or slab jacking if needed.
Frequently Asked Questions
Can I use regular construction glue instead of epoxy?
No. Standard construction adhesives lack the tensile strength and water resistance needed for foundation cracks. Epoxy is formulated to bond with concrete and survive soil movement, while regular glue will crumble under load.
How long does a DIY repair last?
When the crack is properly prepared and the correct material is used, a DIY fix can last 5‑10years. Longevity drops sharply if moisture keeps entering the slab or if the foundation keeps moving.
Do I need a permit to repair a foundation crack?
In most residential zones of Wellington, minor crack sealing doesn’t require a building permit. However, extensive work like underpinning or installing new piers does. Check with the local council if you’re unsure.
What safety gear is essential?
At minimum wear a N95‑type respirator, safety glasses, heavy‑duty gloves, and steel‑toe boots. If you’re cutting concrete, ear protection and a dust‑tight cover for the saw are also recommended.
Is it worth trying a DIY fix before hiring a contractor?
For small, non‑structural cracks, a DIY patch saves money and can be a quick solution. Just be ready to call a professional if the crack re‑opens or spreads after you’ve sealed it.
Bottom line: if the crack meets the narrow, dry criteria and you follow the step‑by‑step plan, you can confidently tackle foundation crack repair yourself. Keep an eye on the repair, manage moisture, and don’t hesitate to bring in a structural engineer when the situation feels beyond a weekend project.
Author
Damon Blackwood
I'm a seasoned consultant in the services industry, focusing primarily on project management and operational efficiency. I have a passion for writing about construction trends, exploring innovative techniques, and the impact of technology on traditional building practices. My work involves collaborating with construction firms to optimize their operations, ensuring they meet the industry's evolving demands. Through my writing, I aim to educate and inspire professionals in the construction field, sharing valuable insights and practical advice to enhance their projects.