
New Build Mold Risk Calculator
Answer these questions to assess the potential for mold growth in your new construction project.
Result
Recommendations:
Imagine moving into your brand-new home, excited about the fresh paint and crisp floors. Then, you notice a musty smell in the bathroom or dark spots on the ceiling. It’s not just ugly; it’s a sign of mold, which can damage your health and your investment. For many homeowners, mold in a new build feels like a betrayal. You didn’t buy an old house with hidden problems; you bought a modern structure built to last. So why is this happening?
The truth is that new builds are actually *more* susceptible to certain types of mold than older homes if specific steps aren't taken during construction. Modern building codes prioritize energy efficiency, meaning tighter seals and less natural airflow. Without proper planning, trapped moisture becomes a breeding ground for fungi. The good news? You can prevent this entirely by focusing on three critical areas: material selection, ventilation design, and construction quality control.
Understanding Why New Homes Get Moldy
To stop mold, you first need to understand where it comes from. Mold needs two things to grow: organic material (like drywall paper or wood) and moisture. In a new build, the moisture usually comes from one of three sources:
- Construction Moisture: Concrete foundations, brickwork, and plaster contain significant amounts of water when laid. This "green" moisture needs time to evaporate.
- Living Moisture: Cooking, showering, breathing, and washing clothes release liters of water vapor into the air every day.
- External Intrusion: Poorly sealed windows, roof leaks, or inadequate drainage can let rainwater seep into walls.
In older homes, drafts naturally carried some of this moisture outside. Today’s airtight designs keep heat in but also trap humidity. If that humidity isn’t actively removed, it condenses on cold surfaces-like window frames or external walls-and creates perfect conditions for mold spores to settle and grow.
Material Selection: Building a Mold-Resistant Shell
The materials you choose form the first line of defense. While no material is completely immune, some resist moisture far better than others.
| Material | Mold Resistance | Best Use Case | Cost Consideration |
|---|---|---|---|
| Standard Drywall | Low | Dry interior rooms | Low |
| Mold-Resistant Drywall | High | Bathrooms, kitchens, basements | Medium |
| Cement Board | Very High | Shower surrounds, exterior siding | Medium-High |
| Pressure-Treated Lumber | High | Framing near concrete slabs | Medium |
| Vinyl Siding | High | Exterior cladding | Low-Medium |
Pay special attention to the core of your drywall. Standard drywall has a paper backing that acts like food for mold. Look for mold-resistant drywall, which uses fiberglass mats instead of paper and often includes antimicrobial additives. It costs slightly more upfront but saves thousands in remediation later. Similarly, avoid placing untreated wood directly against concrete floors. Use pressure-treated lumber or metal stud framing in these areas to break the capillary action that wicks moisture up into your walls.
Ventilation: The Unsung Hero of Moisture Control
You can have the best materials in the world, but without proper airflow, they will fail. Ventilation isn’t just about comfort; it’s a structural necessity. There are three main systems to consider for a new build:
- Exhaust Fans: Every bathroom and kitchen should have a dedicated exhaust fan that vents directly to the outside, not into the attic. Look for fans rated at least 1 CFM per square foot of room area. Add a humidity sensor so the fan runs automatically when moisture levels spike.
- Heat Recovery Ventilators (HRV): In colder climates, an HRV exchanges stale indoor air with fresh outdoor air while retaining heat. This prevents the energy loss associated with opening windows but ensures constant air turnover.
- Energy Recovery Ventilators (ERV): Similar to HRVs, ERVs also transfer moisture between air streams. They are ideal for humid climates because they help dehumidify incoming air without over-drying the home in winter.
If you’re in a moderate climate like Wellington, New Zealand, an ERV might be overkill, but a simple whole-house fan combined with strategic window placement can work wonders. The key is cross-ventilation. Design your floor plan so that opening windows on opposite sides of the house creates a breeze path through living areas.
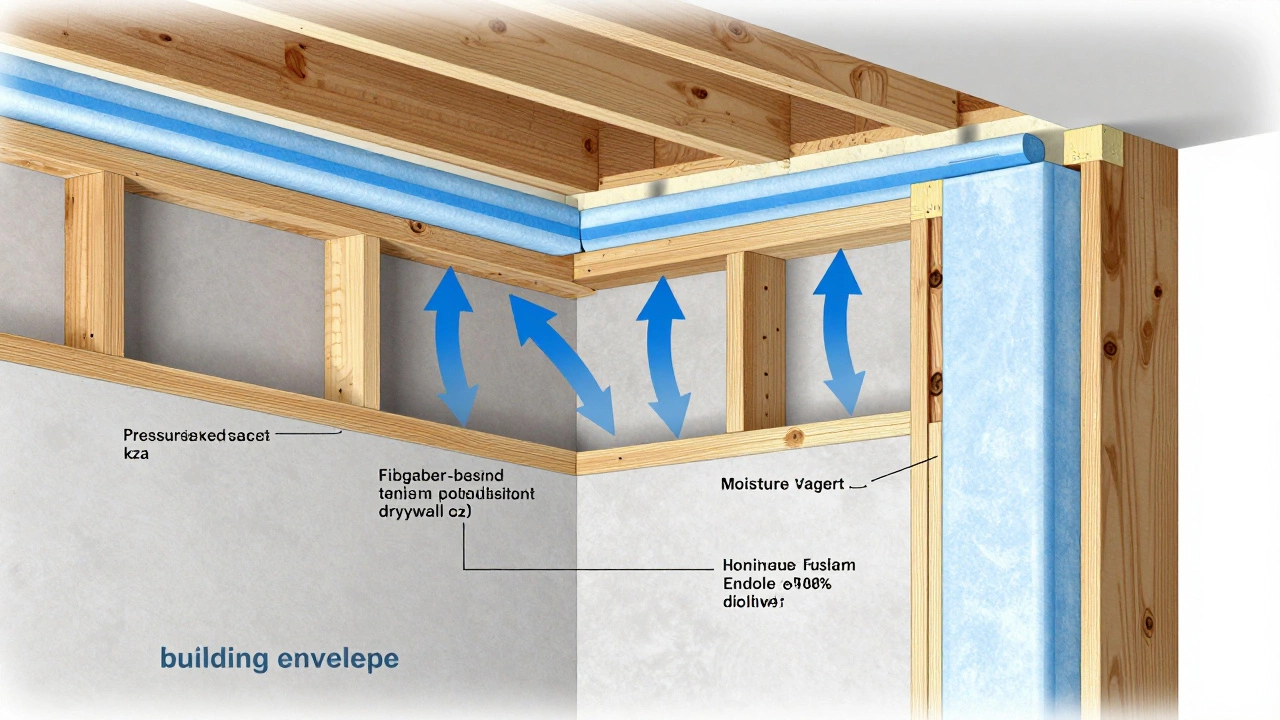
Construction Quality: Sealing the Envelope
Even the best-designed system fails if installed poorly. The "building envelope"-the barrier between inside and outside-must be continuous. Gaps around windows, doors, and utility penetrations are common entry points for rain and humidity.
Hire a builder who understands air sealing techniques. This means using high-quality tape, caulk, and foam insulation to seal every joint in the wall assembly. Pay particular attention to the top plate of the walls where they meet the ceiling joists. This is often overlooked but is a major source of thermal bridging and condensation.
Also, ensure that your foundation has a proper vapor barrier. In New Zealand, standards require damp-proof courses in all new builds, but verifying that the membrane is intact and properly sealed at corners makes a huge difference. A cracked vapor barrier allows groundwater to migrate upward, saturating subflooring and promoting black mold growth beneath carpets and flooring.
Post-Build Care: Drying Out Your New Home
Your job doesn’t end when the keys are handed over. New buildings hold a surprising amount of residual moisture from the construction process. Plaster, concrete, and timber can take months to fully cure. During this period, you must actively manage the indoor environment.
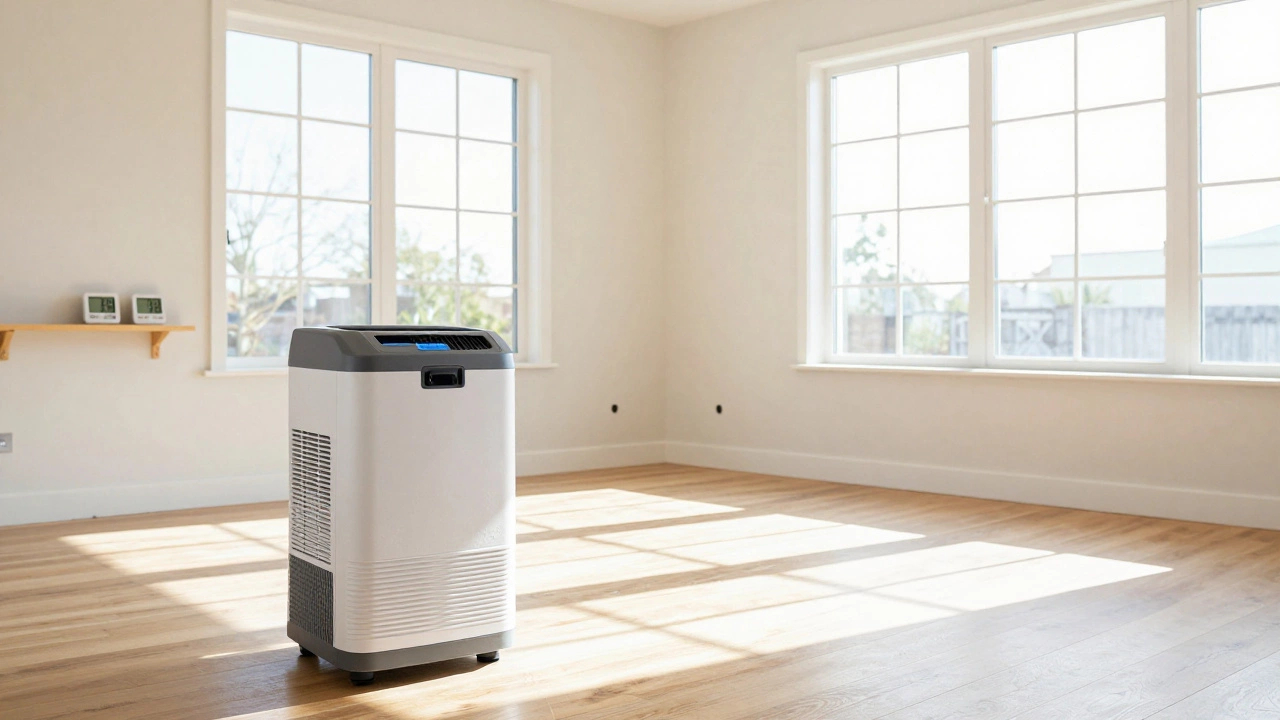
- Use Dehumidifiers: Run industrial-grade dehumidifiers in closed rooms for the first 3-6 months. Aim to keep relative humidity below 50%.
- Monitor Humidity Levels: Buy inexpensive hygrometers and place them in different rooms. If you see readings above 60%, increase ventilation or dehumidification immediately.
- Avoid Carpeting Early On: If possible, delay installing carpets until the house has been lived in for at least six months. Hard surfaces allow you to see and clean up any early signs of moisture issues.
This phase is critical. Many homeowners skip it, assuming their HVAC system will handle it. But standard heating systems don’t remove moisture; they only warm the air. Without active drying, that construction moisture stays trapped in your walls, leading to mold blooms within the first year.
Regular Maintenance and Inspection
Prevention is an ongoing process. Once your home is settled, establish a routine inspection schedule. Check under sinks, behind toilets, and around window frames quarterly. Look for discoloration, warping, or soft spots in wood.
Keep gutters clean to prevent overflow onto the foundation. Ensure downspouts direct water at least 1.5 meters away from the house. Even small leaks in the roof flashing can introduce enough moisture to start a colony behind your insulation before you ever see a drop on the ceiling.
Is mold-resistant drywall really worth the extra cost?
Yes, especially in high-moisture areas like bathrooms and kitchens. While it costs 10-20% more than standard drywall, it significantly reduces the risk of mold growth. Remediation costs for mold can easily exceed $10,000, making the initial investment negligible in comparison.
Can I rely solely on my air conditioner to prevent mold?
No. Air conditioners do remove some humidity as a byproduct of cooling, but they are not designed for continuous dehumidification. In humid climates, an AC unit may run intermittently, leaving periods where humidity rises. A dedicated dehumidifier or ERV system provides consistent control regardless of temperature.
How long does it take for a new build to fully dry out?
It typically takes 6 to 12 months for a new home to reach equilibrium with its surrounding environment. Factors like climate, construction materials, and weather during the build affect this timeline. Active dehumidification can speed up the process significantly.
What are the signs of hidden mold in a new home?
Watch for persistent musty odors, unexplained respiratory symptoms among occupants, visible condensation on windows or pipes, and peeling paint or wallpaper. If you suspect hidden mold, hire a professional inspector with thermal imaging equipment to detect moisture pockets within walls.
Does painting with mold-resistant paint prevent mold growth?
Mold-resistant paint contains biocides that inhibit surface growth, but it does not stop mold from growing behind the paint if moisture is present in the wall. It is a helpful supplementary measure, not a substitute for proper ventilation and moisture control.
Author
Damon Blackwood
I'm a seasoned consultant in the services industry, focusing primarily on project management and operational efficiency. I have a passion for writing about construction trends, exploring innovative techniques, and the impact of technology on traditional building practices. My work involves collaborating with construction firms to optimize their operations, ensuring they meet the industry's evolving demands. Through my writing, I aim to educate and inspire professionals in the construction field, sharing valuable insights and practical advice to enhance their projects.